Facebook Dynamic Ads Retargeting 101: A Simple Step-by-Step Guide
- Dec-12-2018
- Adil Malick
- 3 comments
Retargeting is really effective for sellers to reach there pre-qualified audience, previous buyers, and push them the content that they like.
Facebook is an amazing tool to get deep into the audience insights. That’s why, today I am going to cover Facebook Dynamic Ads Retargeting.
Why Dynamic?
Whenever someone leaves your website or performs some relevant action as per your funnel, an Ad is going to be shown to them.
Here is something that I found from retargeting:
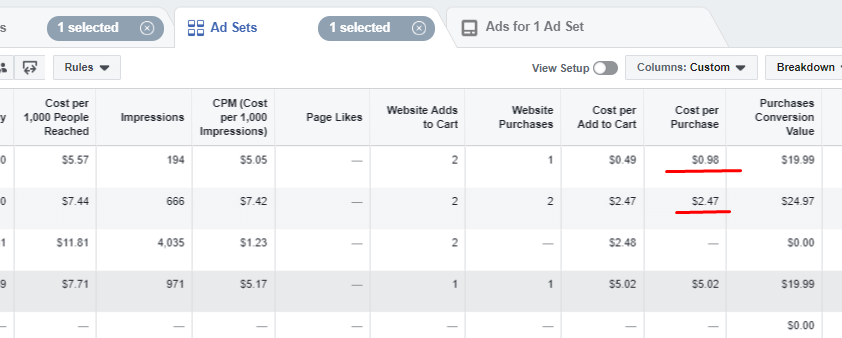
How did I get such numbers from retargeting? What steps did I follow?
Basically, it’s easy to sell to someone who has visited your store/website. You have an idea about the products they like.
So if you want to experience amazing jumps in your conversions, then this guide is definitely for you.
Let’s get started.
How to create a Product Feed in Shopify?
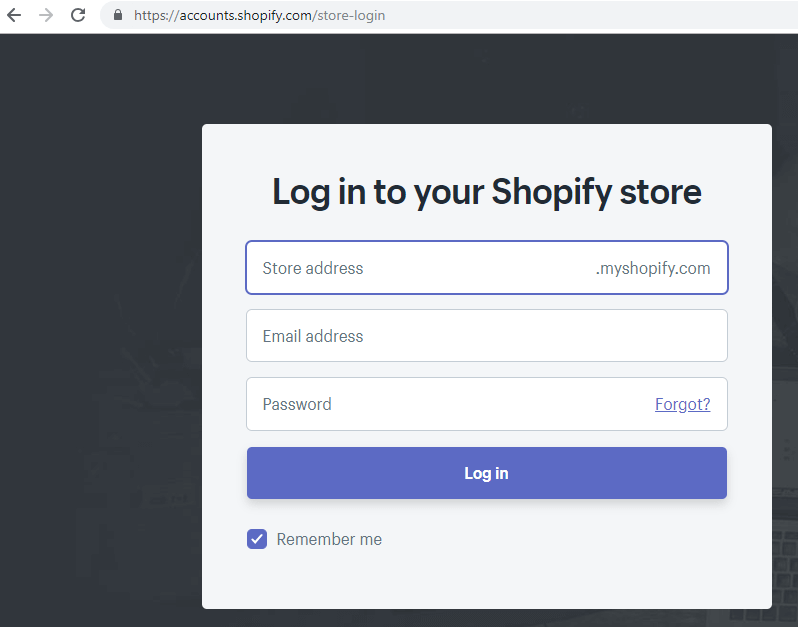
Step 1: Login in to Shopify Admin
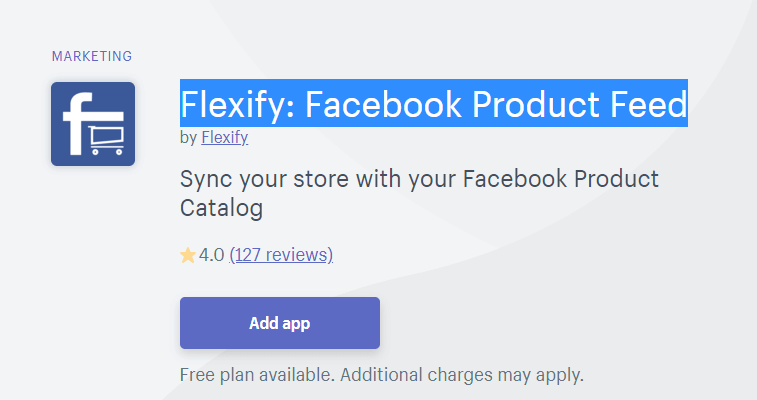
Step 2: Install Flexify: Facebook Product Feed
https://apps.shopify.com/facebook-product-catalog
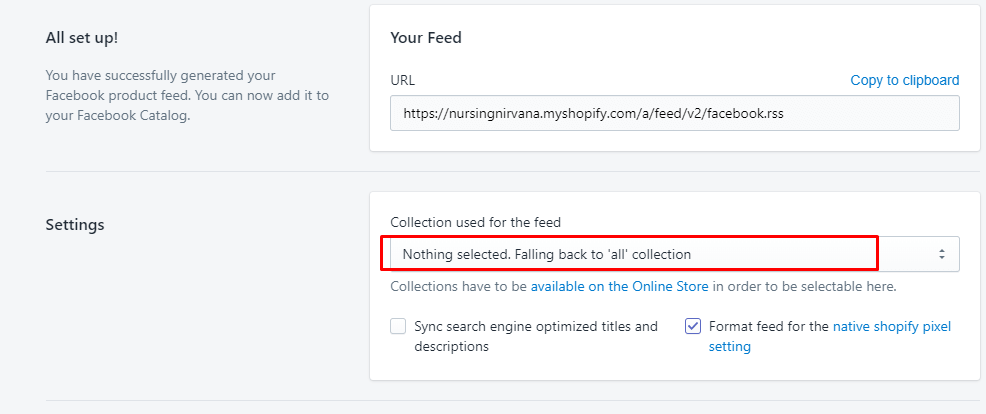
Step 3: Open App in Shopify Admin and select the collection that you want to create the feed and copy the feed URL from Top.
Uploading Product Feed in Facebook
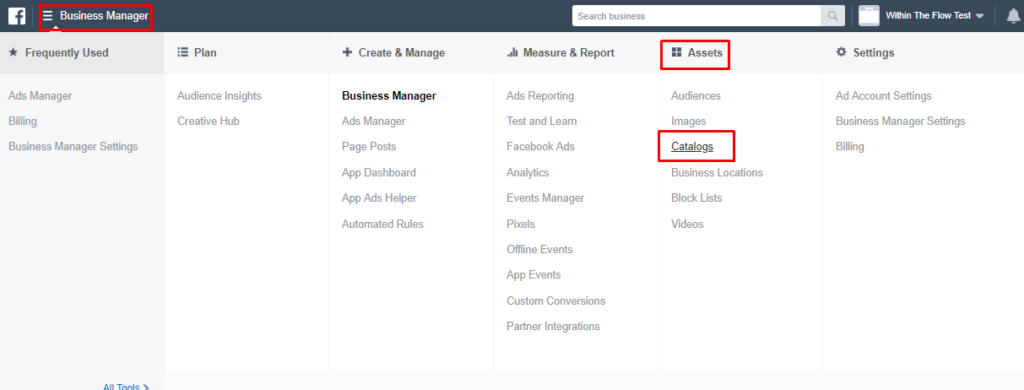
Step 1: Go to business.facebook.com and hit Catalog.
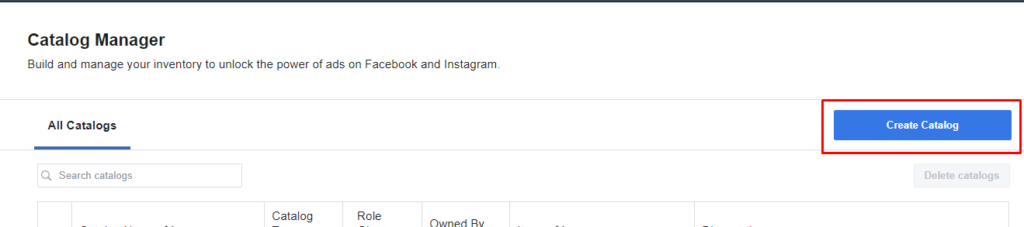
Step 2: Click Create Catalog
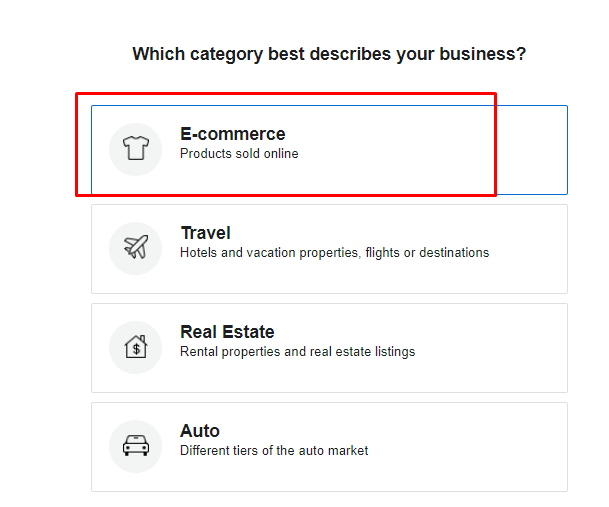
Step 3: Select Ecommerce from this.
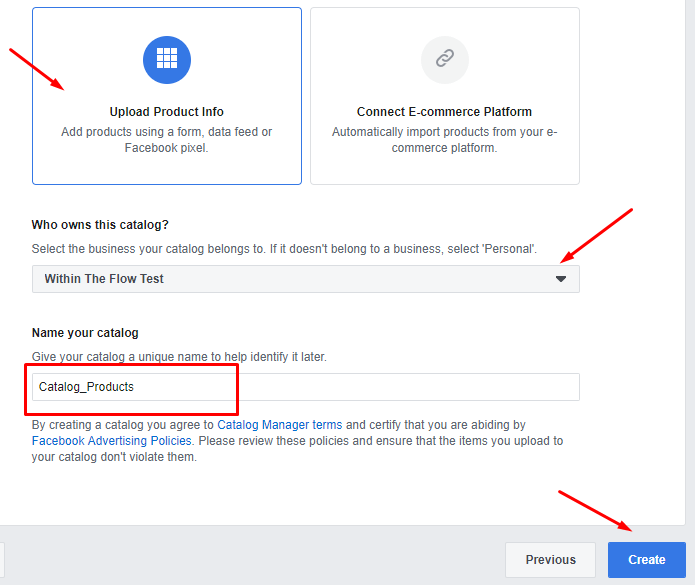
Step 4: Fill out the from by selecting the Business Manager Account, giving it a name and clicking create.
Next step is to fill it with products.
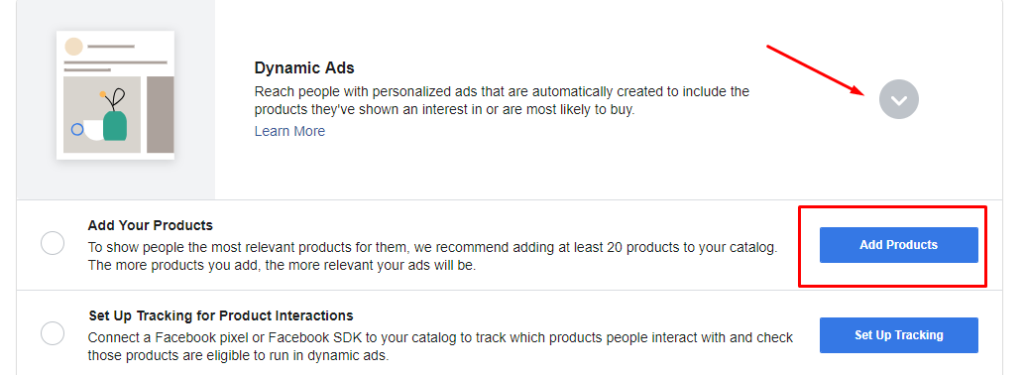
Adding products in Product Catalog
Step 1: Select Dynamic Ads from this and select Add Products.
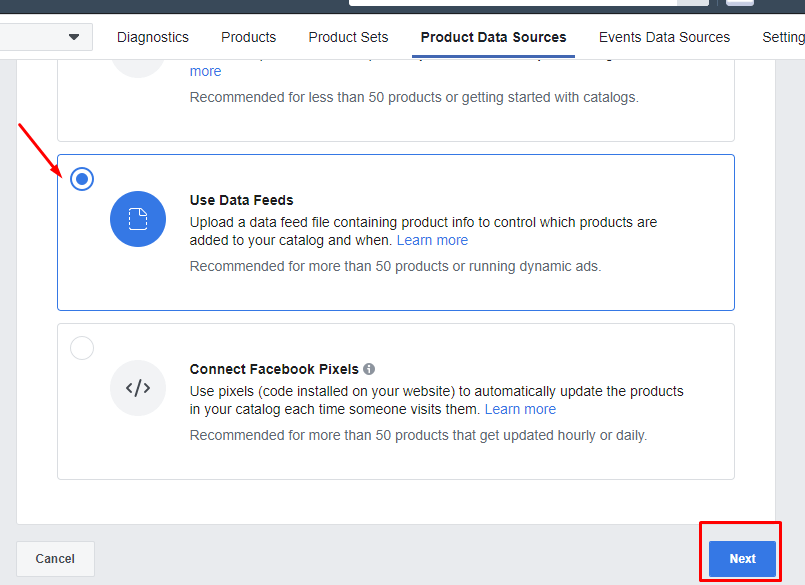
Step 2: Select the Use Data Feeds option from here:
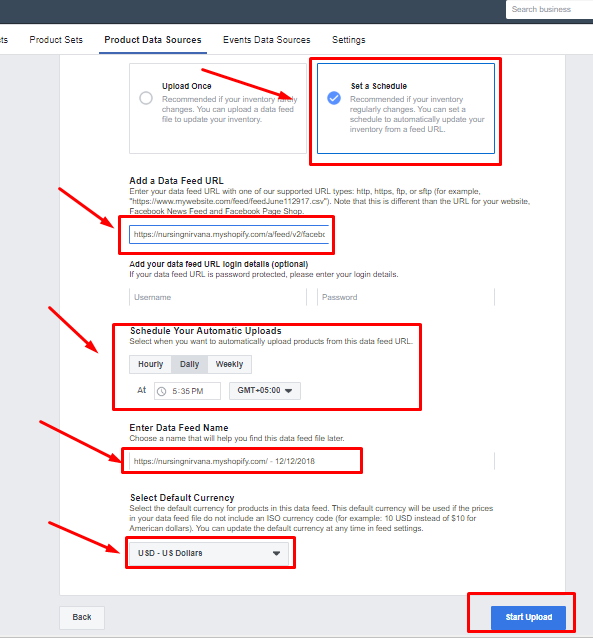
Step 3: Select ‘Set a Schedule’. Put the feed URL that you have copied from Shopify.
And schedule your updates to see how frequently you upload your products for testing.
Give it a name, Select Default Currency and click Update.
Click Start Upload.
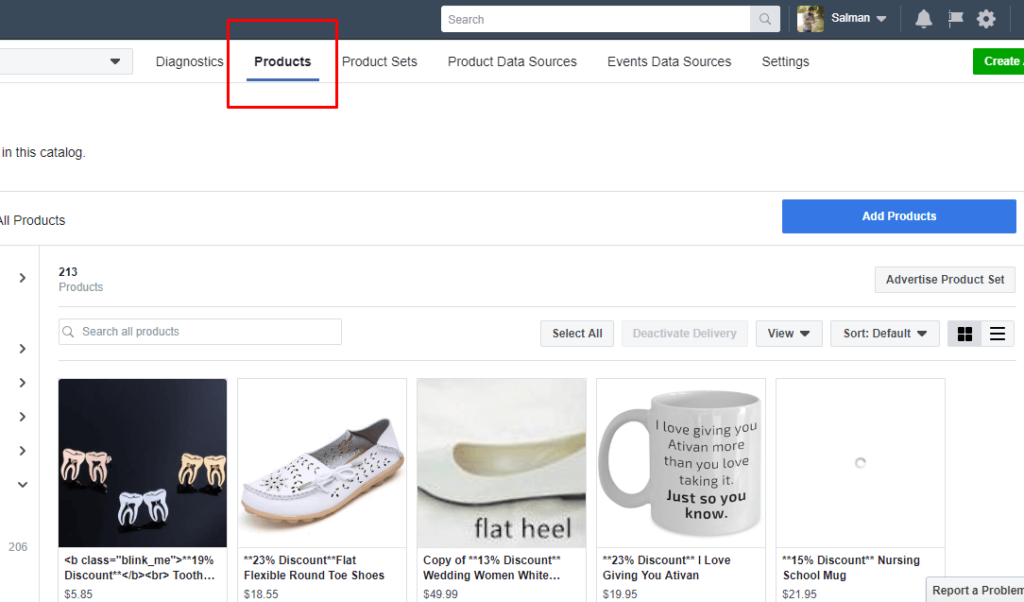
Click Products from the Top menu and you will see all your products uploaded in your store.
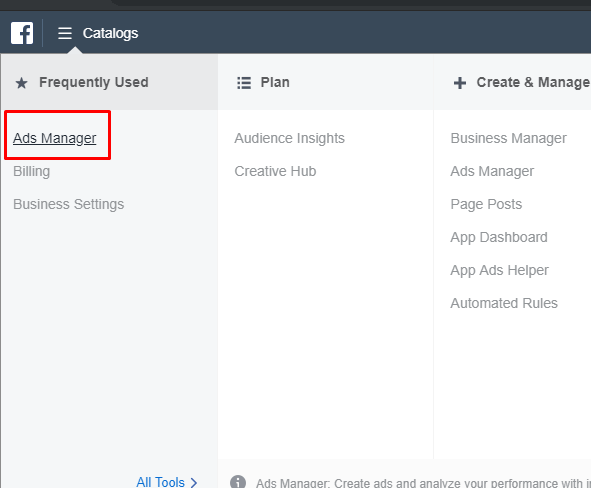
Running Dynamic Ads
Step 1: Go to Ads Manager
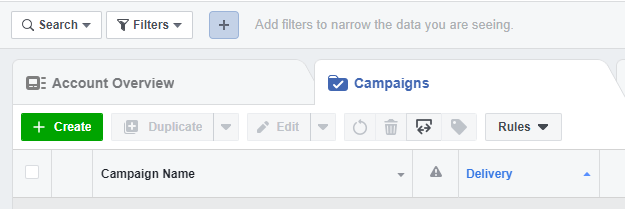
Step 2: Click Create by selecting the Campaign Tab
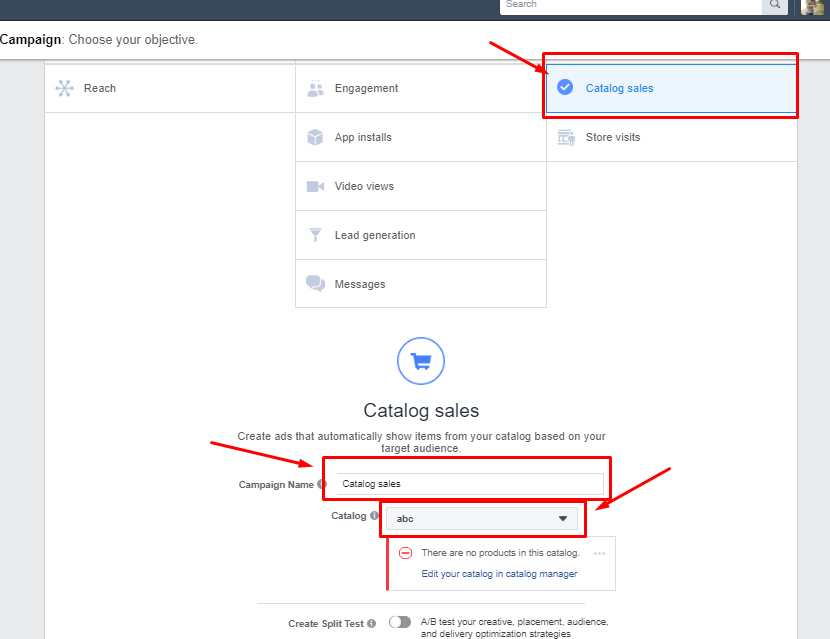
Step 3: Select Catalog Sales from the Campaign Objectives and select the catalog where you uploaded the products.
Step 4: Now navigate to Audience. Select Retarget products to people who visited your website or app.
Here we have the following options: Viewed or Added to Cart but not purchased and Added to Cart not purchased.
Select the related option

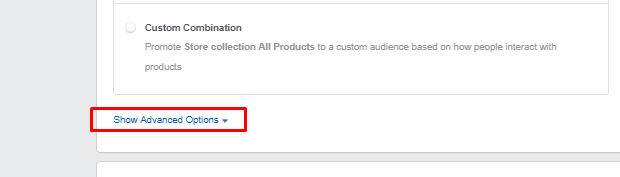
Select Show Advanced Options
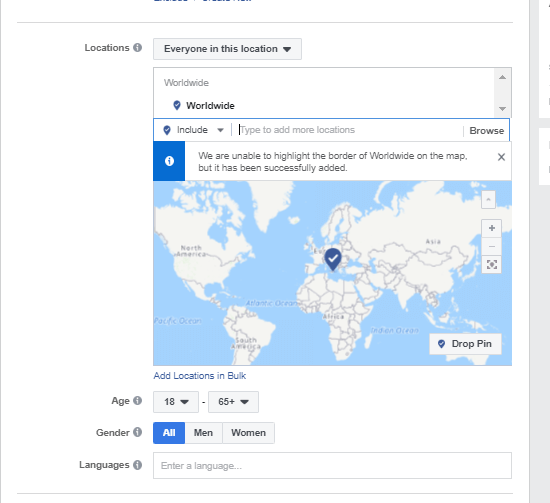
Select your Locations from where you are targeting.
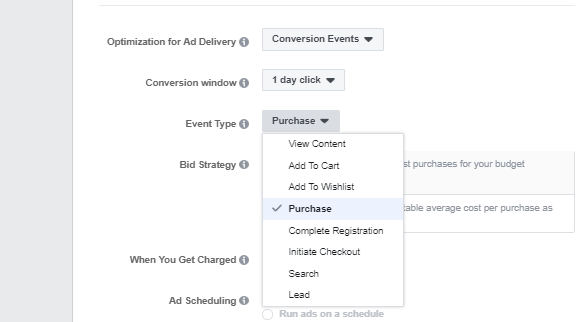
Step 5: It is better to select Add to Cart and View Content if your pixel is not mature.
*Pro Tip: Do offer them discounts is your Ad copies on the Ad level.
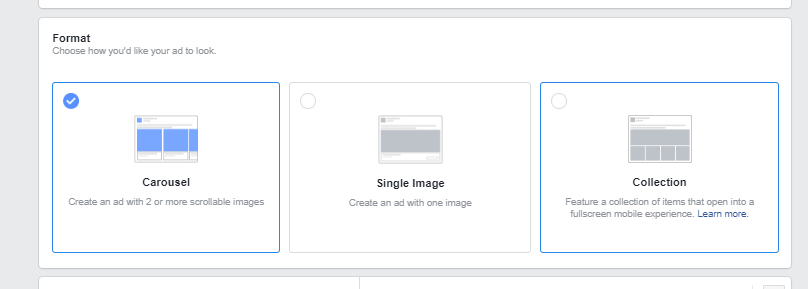
Step 6: Here in the last step you would select what would be your Ad format. I usually go with Carousel (but you can use any other format you like).
This brings an end to my guide. I hope it’s been helpful.
Go ahead and test this thing. I am waiting for your questions!
Related Article:
Facebook Audience Insights Hack

Adil is an inbound marketing veteran with 7 years of experience in the industry. He’s the mastermind of all things related to inbound-strategy at WithinTheFlow. He’s also spending time helping out our community with their SEO problems in our official group.
 Facebook Detailed Targeting – How to Get the Most Potential Customer
  How to Sell on Facebook Marketplace?
  Facebook Video Ads Guide – How to Make Profitable Video Ads in 2020
  How Much Does Facebook Advertising Cost?
Hi there ! thanks for the video, good advices. How would you implement this strategy for a Saas Business a bit like Trello. As we are not selling products what can we retarget to them? thanks !?
Hey, Nicolas Retargeting for SAAS business is a bit different. There you can create a Custom Audience of Website Visitors and they you can retarget them. If you can tell a bit more about your services like are you selling only one thing or have multiple services then the targeting would be a bit different.